One of the reasons I missed this deadline was because I kept thinking of more information I absolutely HAD to add to my reviews! I made handwritten notes while sewing each piece and my original strategy was just to type in the notes and submit. But then I started remembering all those conversations I had with myself while sewing the garments and felt the need to share every.single.thought. Haha! Every single garment was completely finished by 7:00 p.m. on Sunday which should have given me plenty of time to take pictures, review, and submit, right? Well, wrong in my case. Anyway, I got this fabulous new wardrobe!!
 You may or may not notice two things about these pictures. I started photographing just as the sun was setting and by the time I took the pictures with the jeans there was hardly any daylight left (this is more noticeable on the PR composite review). The picture on my stairway was taken at about 11:55 p.m. LOL! As I was busily typing away, I realized I didn't photograph the blouse/jeans combo and dropped everything to change clothes and get the cell phone out.
Even with all my typing in the reviews, I knew I didn't have a chance to include everything I wanted to say. So, I decided to write a GIGANTIC BLOG POST WITH ALL THE WORDS, as if I'd saved up all my words from the past three years to share every single one of my sewing talking-to-myself conversations. :)
In the past 12 months I've produced two really great, wearable wardrobes. The funny thing is, while planning and sewing I never realized until I was finished how really boring and basic the pieces were all alone...except for one. Each wardrobe has one statement piece and it's the one and only PRINT fabric in the collection. That one print pulls everything together and gives the wardrobe my custom - you can't buy this in a store - look. It sounds very simple, but really, I didn't realize I had done that until the entire wardrobe was done! (FYI - I don't have any white walls in my house and this wall already has a nail in it for hanging and photographing garments.


I thought it would be more of an upholstery-type brocade but it was a very loose weave, it even stretched but stretched length-wise. Right before I cut into the fabric I decided to switch it up and cut it on the cross grain. That way the stretch would go around my body instead of up and down. It was really difficult to see a top-bottom to the pattern so changing the grain direction wouldn't make that much difference.
This must be a TNT pattern for me because off the top of my head I can think of three other skirts I've made with it. It's a favorite because POCKETS! One of the pictures on my pattern review show that my arm is so far into the pocket it's almost up to my elbow! The pockets are barely noticeable when worn, but I could probably walk around with my entire lunch in them and nobody would notice. lol.
In the late 90's a straight skirt, turtleneck, and tights ala Goldie Hawn in Deceived and Meg Ryan in When Harry Met Sally (one specific scene) became my "jeans and a t-shirt" work outfit. That's what I was thinking about for this skirt.


Even with all my typing in the reviews, I knew I didn't have a chance to include everything I wanted to say. So, I decided to write a GIGANTIC BLOG POST WITH ALL THE WORDS, as if I'd saved up all my words from the past three years to share every single one of my sewing talking-to-myself conversations. :)
In the past 12 months I've produced two really great, wearable wardrobes. The funny thing is, while planning and sewing I never realized until I was finished how really boring and basic the pieces were all alone...except for one. Each wardrobe has one statement piece and it's the one and only PRINT fabric in the collection. That one print pulls everything together and gives the wardrobe my custom - you can't buy this in a store - look. It sounds very simple, but really, I didn't realize I had done that until the entire wardrobe was done! (FYI - I don't have any white walls in my house and this wall already has a nail in it for hanging and photographing garments.


For both of these wardrobes I've relied on the multitude of resources at my fingertips: my home sewing library, pinterest, (formerly) Craftsy, YOUTUBE (my favorite at the moment), and a whole lot of think, think, thinking - trying to remember how I used to sew when I had zero work stress. I love quality, precision sewing but I also LOVE efficient sewing. I attended workshops that opened my eyes to garment factory sewing methods in the 80's and loved the idea that my clothes didn't have to look "home made" (that is actually a lifelong sewing goal introduced by my mom who took levi's labels from worn out jeans and sewed them into some of my brothers denim clothes!). Thanks to the WWW I found many fascinating videos from sewing factories and loved studying their methods and deciding what I could incorporate into my sewing. My favorite links are included below.
The Statement Piece.
The fabric is from Style Maker Fabrics and the first time I saw it I began to come up with a reason for buying more fabric. Enter the mini wardrobe contest. Then I dove into my stash and found all these fabrics I already had to go with it.I thought it would be more of an upholstery-type brocade but it was a very loose weave, it even stretched but stretched length-wise. Right before I cut into the fabric I decided to switch it up and cut it on the cross grain. That way the stretch would go around my body instead of up and down. It was really difficult to see a top-bottom to the pattern so changing the grain direction wouldn't make that much difference.
This must be a TNT pattern for me because off the top of my head I can think of three other skirts I've made with it. It's a favorite because POCKETS! One of the pictures on my pattern review show that my arm is so far into the pocket it's almost up to my elbow! The pockets are barely noticeable when worn, but I could probably walk around with my entire lunch in them and nobody would notice. lol.
In the late 90's a straight skirt, turtleneck, and tights ala Goldie Hawn in Deceived and Meg Ryan in When Harry Met Sally (one specific scene) became my "jeans and a t-shirt" work outfit. That's what I was thinking about for this skirt.

Sigh, I spent so much time matching the pattern but in the end it seemed like the pattern was so busy I couldn't really see the matching part. Trust me even if you can't see, it matches!
Normally it takes me maybe three-four hours to make a lined skirt. This one took eight. Wasted time with no time to waste BUT beautiful results :). This skirt will last a long time.
PR Review - Totally forgot to mention how awesome these pockets are! Easy to sew and incredibly deep. A great place to hide all your secrets ;)
The Jacket
During my Minneapolis days I made many blazers. I made many, many, many blazers and loved making them. Since moving to Cleveland in the late 90's I think I've made two blazers...a long time ago. I really just needed to remember what I already knew - enter Ms. WWW and Pinterest. Throughout the sewing process of my detailed garments (skirt, blazer, blouse) much of my time was spent watching, reading, and thinking. Think, think, think, sew, read, watch video, repeat. Fabric is from a visit to S.R. Harris several years ago.
I plan to take it to a dry cleaner for pressing. There's something they can do that my home iron can't. I'm hoping that will give a sharper edge to my seams.
What do you think about the vertical lines from mid shoulder to BP? I still (even though I've gained many pounds) usually start with a size 14 (because that best reflects my shoulder/chest area) and adjust from that. For this jacket I cut a straight 16 but ended up with those vertical lines. Do you think that's why? Should I have cut a 14 and increased from there?


Resource Links:
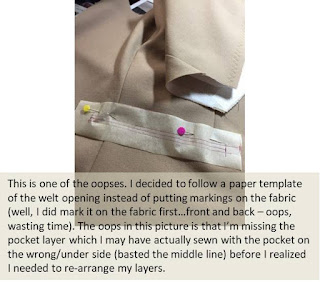
Pocket - at about 11:50 welt
Shoulder - Ann Rowley pix
Bagging a lining, front facing intersection - bagging a lining
PR review Review
The Blouse
I'm pretty sure this fabric is from JoAnn's. I believe that's where I found it because I remember seeing it other times and thinking "I should buy this."before I remembered that I already have it, lol. Pretty sure it's a cotton/rayon blend found in the denim/chambray section. I really wanted to make a lightweight denim blouse instead of chambray (which I think always looks a little "preppy") but when the STATEMENT fabric arrived it was clear this chambray was a better match than my lightweight denim.
I watched many-a-video about sewing blouses in a factory in an effort to streamline my sewing and am really pleased with the results. Templates are very helpful.
Links:
Watch with an open mind (and set the video speed to 1.5). Attaching the cuff See pictures of this method at Pattern.scissors.cloth


** I made the turtleneck and jeans first and when I was finally ready to take my skirt to the machine, I decided I should change the needle in my industrial. During that frustrating process because everything was too tiny in my hands, I dropped and completely lost the screw that holds the needle in place. Ugh. After many *&$%^#&* words, I took a deep breath and calmly realized that my regular machine and serger would be able to handle everything else. And then, I carried on. (Today I found a shop that had a replacement - yay!)
Oh, and instead of all those sleeve/cuff adjustments I was just going to use those pattern pieces from my Granville (Sewaholic) except I COULDN'T FIND THE PATTERN! I still haven't found the pattern UGH!
The Jeans


Even after a few YEARS of seeing web-seamsters share their love of making jeans, I resisted. On thing that made me start to change my tune was when I began a silent work protest (in my head). With added accountability being mounted on teachers in my district, little things in my daily life seemed more and more difficult to do. One of those things was deciding what to wear in the morning (the other was using precious morning time to put in my contacts which I stopped doing). It took so much energy and I didn't have any energy to spare. Sooooooo, I started wearing jeans every day. Yup, that was it. I stopped wearing my nice dress pants or skirts or dresses because it took too much time to figure out what to wear. FYI: not one person noticed my silent protest (unless I told them) but I knew, and it was my way to make my clothing speak for me just like I did in high school. :)
This pattern tho. I think I've worked the pattern to death and still don't have a perfect fit. I did several modifications to my original muslin and my fist official pair fits well, but I lost the pattern (??!!) In an effort to tackle the crotch area, I turned to youtube and found videos showing the "fish bowl" method and thought "this is it!" So, I did the whole fitting thing and applied it to this pair of jeans. It was not the answer. The front is definitely 1" too long and the CB is about 1/2" to low!! Aye yi yi. And then I wore them a couple of times and they were so baggy after a day of work. So my question is...how do you know how to adjust for the amount of fabric stretch? And, how do you know the exact (not minimum, not maximum) amount of stretch your fabric should have to fit the way the designer intended?
Anyway.... I LOVE them anyway! I had no idea there was a hole in my wardrobe that only a pair of skinny off-white jeans could fill. I'll wear them the way they are until I am properly motivated to fix the front (I'm thinking the easiest fix is to lower the waistband).
Links:
My favorite jeans-sewing video set Part #1
The fish bowl
The Turtleneck
Um, it's a turtleneck, six seams and three hems.
My only deep thought about this garment is I LOVE THE COLLAR! To me, a nice snug turtleneck collar is like bringing my childhood blankey with me wherever I go. Smirk.
I made an FBA, added room at the hips, and spent time perfecting my shoulder slope for each side. I'm disappointed that the stitching around the armscye resulted in a shoulder seam that doesn't lie flat on my shoulders. I'm hoping the fabric will correct itself once it runs through the wash/dry cycle. Oh, and I made it sleeveless. I compared the armscye to and actual sleeveless pattern and they matched almost perfectly so I didn't make any pattern adjustments. I coverstitched the hem and armholes.
The End?
- I love these garments and they will all be worn frequently (they already have been!).
- Many of the pieces match my previous contest garments and the extras I made after that contest.
- It will be very easy to add pieces that work with this wardrobe.
- I've realized a contest gives me deadlines and makes me make sewing (therapy) a priority.
- I feel like I haven't run out of ALL THE WORDS but I'm going to end my post here. It's already taken me three evenings to write this.
Leaving now and starting to save up my words for the next GIGANTIC BLOG POST.
Happy Sewing To All!
Comments
I definitely feel I'm being pushed out and it's happening to other veteran teachers too. So frustrating and disheartening especially for our students. The reduction in music has been going on for so long, the students don't even know what they're missing. :(