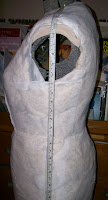
I used a series of articles from Threads magazine #44, 45, 47 and 48 (December 1992 through August/September 1993) written by Suzanne Pierrette Stern to complete this dress form remodel.
5. Marking
Time to mark the center front/back, sides, and waist. Following the instructions, I used my tape measure to draw in the vertical lines. I skipped the part where it said to mark the waist (again) with tape/ribbon. I have no explanation as to why I skipped this step – had to make up for it later.


The next vertical line to be marked is the guide for the princess seam. It’s done the same way as the other vertical lines. I determined a starting point at the shoulder and marked my line making sure that it goes of the bust point. On the back I used the front princess line at the should seam to determine the starting point and pinned the tape measure from there.

6. The Grain!
Tear a piece of muslin the length of the dress form and then divide that into four equal pieces each torn lengthwise (to keep the fabric on the grain). At this point I am following the directions and only working with the right side of my dress form. Each of the four pieces needs to have both the lengthwise and crosswise grain marked. To find the grain of a piece of fabric you need to pull a thread (the article suggests pulling two individually) the length of the piece. This creates a line in the fabric.
 Warning!: Marking the grain on all four pieces took me two hours! Of course for the first two pieces I thread-traced the grain and then read the instructions that said this wasn’t necessary, she only did for the pictures. With this fabric the thread was constantly breaking and then I couldn't find the same thread to finish pulling. It was a long process.
7. Draping the muslin pattern.
This is like a “rough draft” of the muslin and will be used to create a pattern that will be sewn, fitted on the real body, and then returned to the dress form. So while the measurements and fitting are important, at this point they aren’t “do or die” important. The grain placement however, is always “do or die” important.
The first piece to drape is the center front. Match the lengthwise grain with the CF marking and the crosswise grain with the bust point.


Next up, Issue 47!
5. Marking
Time to mark the center front/back, sides, and waist. Following the instructions, I used my tape measure to draw in the vertical lines. I skipped the part where it said to mark the waist (again) with tape/ribbon. I have no explanation as to why I skipped this step – had to make up for it later.


The next vertical line to be marked is the guide for the princess seam. It’s done the same way as the other vertical lines. I determined a starting point at the shoulder and marked my line making sure that it goes of the bust point. On the back I used the front princess line at the should seam to determine the starting point and pinned the tape measure from there.

6. The Grain!
Tear a piece of muslin the length of the dress form and then divide that into four equal pieces each torn lengthwise (to keep the fabric on the grain). At this point I am following the directions and only working with the right side of my dress form. Each of the four pieces needs to have both the lengthwise and crosswise grain marked. To find the grain of a piece of fabric you need to pull a thread (the article suggests pulling two individually) the length of the piece. This creates a line in the fabric.

 Warning!: Marking the grain on all four pieces took me two hours! Of course for the first two pieces I thread-traced the grain and then read the instructions that said this wasn’t necessary, she only did for the pictures. With this fabric the thread was constantly breaking and then I couldn't find the same thread to finish pulling. It was a long process.
7. Draping the muslin pattern.
This is like a “rough draft” of the muslin and will be used to create a pattern that will be sewn, fitted on the real body, and then returned to the dress form. So while the measurements and fitting are important, at this point they aren’t “do or die” important. The grain placement however, is always “do or die” important.
The first piece to drape is the center front. Match the lengthwise grain with the CF marking and the crosswise grain with the bust point.


Next up, Issue 47!
Comments